Master YouTube studio, studio setup essentials for YouTube Growth. Learn proven strategies to start growing your channel with step-by-step guidance for beginners.
Primetime Team
YouTube Growth Experts
February 4, 2026
PT6M
3952
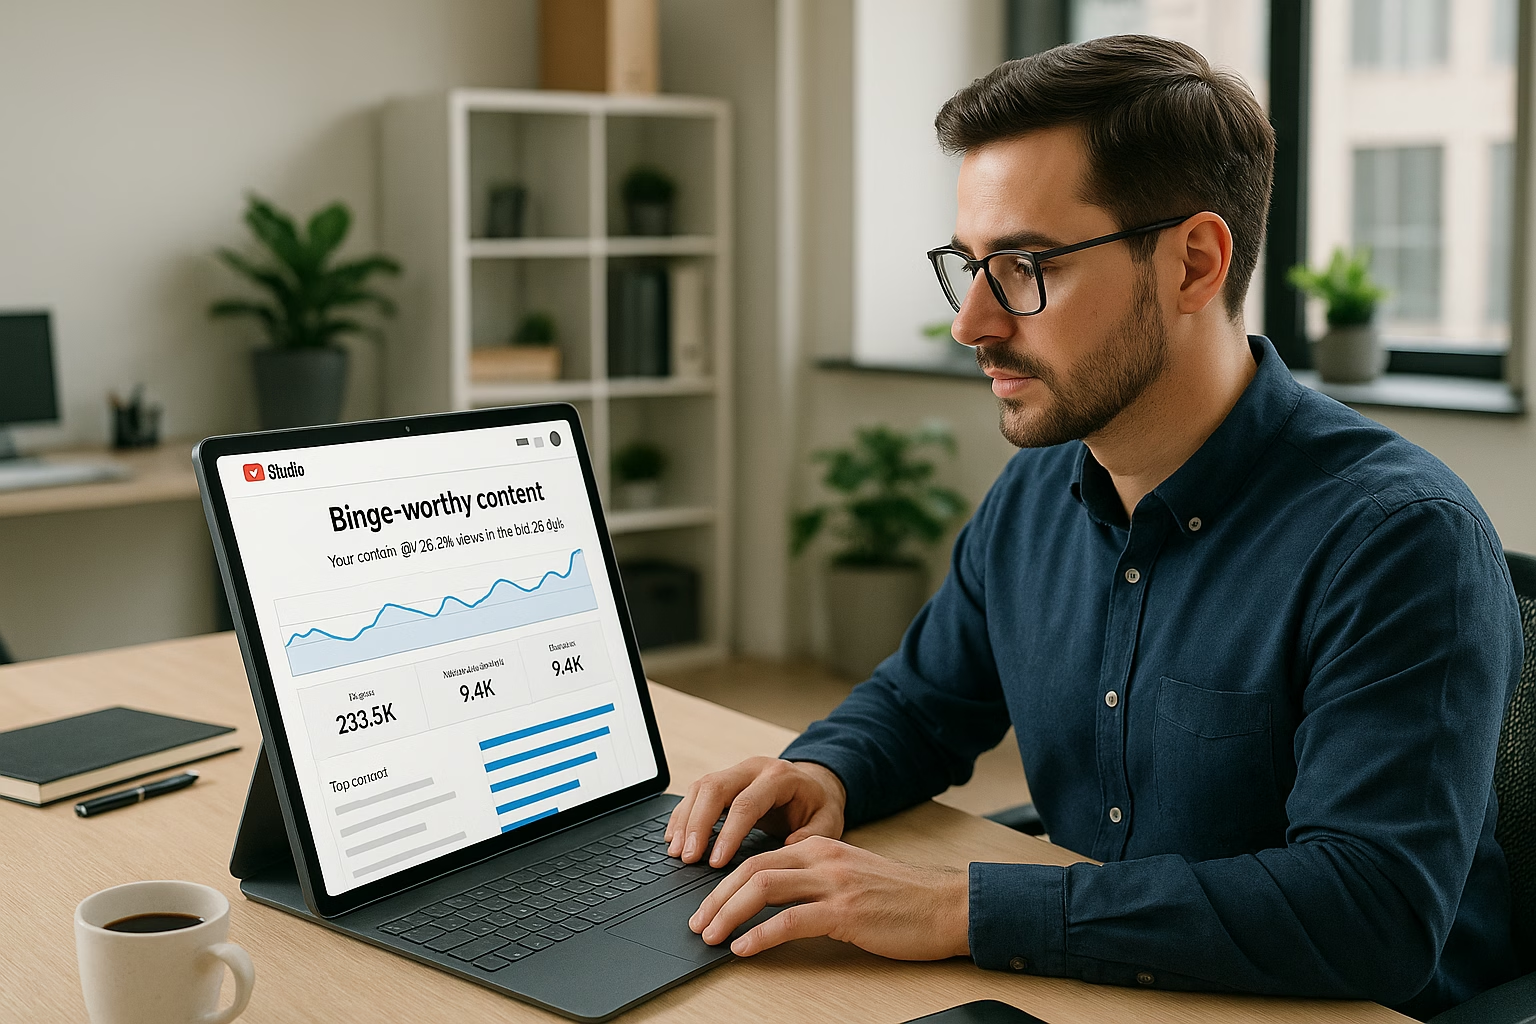
YouTube Studio Setup - Essential At Home Guide
YouTube Studio Setup - Essential At Home Guide
Quick answer: A simple YouTube studio setup at home needs a clean background, stable camera (phone or DSLR), soft lighting, clear audio, and basic editing. Use YouTube Studio desktop for upload defaults and playlists; design consistent thumbnails and metadata templates to encourage binge-watching and faster channel growth.
PrimeTime Advantage for Beginner Creators
PrimeTime Media is an AI optimization service that revives old YouTube videos and pre-optimizes new uploads. It continuously monitors your entire library and auto-tests titles, descriptions, and packaging to maximize RPM and subscriber conversion. Unlike legacy toolbars and keyword gadgets (e.g., TubeBuddy, vidIQ, Social Blade style dashboards), PrimeTime acts directly on outcomes-revenue and subs-using live performance signals.
Continuous monitoring detects decays early and revives them with tested title/thumbnail/description updates.
Revenue-share model (50/50 on incremental lift) eliminates upfront risk and aligns incentives.
Optimization focuses on decision-stage intent and retention-not raw keyword stuffing-so RPM and subs rise together.
👉 Maximize Revenue from Your Existing Content Library. Learn more about optimization services: primetime.media
Why a focused YouTube studio matters
Creating binge-worthy videos starts with a deliberate studio setup. Small improvements in lighting, audio, and background consistency make videos look professional and keep viewers watching. For beginners aged 16-40, a reachable, repeatable at home setup reduces friction and helps you produce series-based content that encourages autoplay and playlists.
Core components of a beginner YouTube studio
Camera: smartphone with 1080p or a basic mirrorless/DSLR.
Audio: USB condenser mic or budget shotgun mic.
Lighting: two softbox lights or ring light for even illumination.
Background: plain wall, textured backdrop, or branded poster; keep it consistent.
Stabilization: tripod or desk mount for steady framing.
Editing software: free tools like DaVinci Resolve or iMovie for quick edits.
Computer: YouTube Studio desktop works best on a laptop/desktop for upload defaults and metadata templates.
Budget YouTube studio setup ideas
On a tight budget, prioritize audio and lighting before upgrading camera gear. A clear-sounding mic and soft lighting improve perceived quality more than an expensive camera. Consider repurposing lamps with diffusion, using a tidy wall as your youtube studio setup background, and recording on your phone with a tripod.
Step-by-step studio setup at home
Step 1: Choose your recording space - pick a quiet corner with minimal echo and controllable light.
Step 2: Set a consistent background - use a plain wall, fabric backdrop, or a branded poster to create a recognizable look.
Step 3: Position lighting - key light at 45 degrees and a fill or ring light to soften shadows; backlight adds depth.
Step 4: Mount your camera - place phone or camera at eye level on a tripod for natural framing.
Step 5: Set up audio - connect a USB or lavalier mic and test levels; prioritize clear voice over room tone.
Step 6: Configure YouTube Studio desktop - set upload defaults, add metadata templates, and create playlist structures for series content.
Step 7: Design thumbnail and title templates - maintain consistent colors, fonts, and image crops to increase binge clicks.
Step 8: Record a test video - check framing, lip-sync, lighting, and background; make small adjustments.
Step 9: Edit efficiently - trim, add a consistent intro/outro, and use chapter markers for watch retention.
Step 10: Publish with playlist strategy - upload episodes into a themed playlist and use end screens to link the next video.
Practical examples for beginner creators
Example 1 - Study Vlogs: Use a tidy bookshelf background, warm softbox light, lav mic, and 1080p phone recording. Create episodes on study tips and add them to a "Study With Me" playlist.
Example 2 - Short Tutorials: Record on a plain background, use a top-down tripod for demos, and edit into 5-7 minute bite-sized lessons. Use consistent thumbnail colors and place videos into a tutorial playlist to boost binge-watching.
Setting up YouTube Studio desktop for workflow
Upload defaults: Fill description template, tags, and visibility preference for faster uploads.
Playlists: Create series playlists and set the "Series" behavior to suggest next videos.
Metadata templates: Save common phrases, links, and credits in a document to paste into uploads.
Thumbnails: Upload a custom thumbnail using a consistent 1280x720 image size and bold fonts.
Analytics basics: Monitor average view duration and audience retention to refine episode length.
YouTube studio Accessories to consider
Pop filter and mic arm - improves audio clarity and placement.
LED light panels with adjustable color temperature - match room lighting for a natural look.
Acoustic foam panels or DIY blankets - reduce echo for cleaner audio.
Backdrop stand and fabric backdrops - quick way to change your youtube studio setup background image or color.
Extra SD cards and external drive - keep recordings organized and backed up.
Designing binge-worthy playlists and thumbnails
Make playlists that feel like seasons. Use consistent thumbnail templates and episode numbering (S1E01 style) to signal continuity. In YouTube Studio desktop, pin the playlist link in the video description and set the playlist order to “custom ordering” for narrative flow.
PrimeTime Media helps creators build repeatable studio workflows, metadata templates, and thumbnail systems so you can focus on content, not chaos. If you want a custom checklist and thumbnail template tailored to your niche, PrimeTime Media can help-start a free consultation and get a bespoke starter kit to launch your binge-worthy series.
Beginner FAQs
How do I set up a YouTube studio at home?
Choose a quiet corner, set a consistent background, add two-point lighting, mount your phone or camera at eye level, and use a USB mic. Configure upload defaults in YouTube Studio desktop for faster uploads and create playlists for series-based content to encourage binge-watching.
What equipment do I need for a budget YouTube studio setup?
Prioritize audio and lighting: a USB condenser or lavalier mic, a ring light or softbox from a budget brand, and a stable tripod for your phone. Use free editing software and your computer with YouTube Studio desktop to manage uploads and metadata templates.
How do I create a Youtube studio setup background?
Pick a clean wall, hang a fabric backdrop, or add a simple branded poster. Use color contrast with your clothing and keep props limited to reduce distraction. Consistency across videos helps viewers instantly recognize your series and promotes binge behavior.
How do I use YouTube Studio desktop to streamline uploads?
Open YouTube Studio desktop, save upload defaults like description, tags, and visibility, and use a metadata template document. Create playlists beforehand and add videos to a series playlist during upload to automate sequencing and encourage viewer retention.
🎯 Key Takeaways
Master YouTube Studio Setup - A Beginner's Guide to Binge-Worthy Vi basics for YouTube Growth
Avoid common mistakes
Build strong foundation
⚠️ Common Mistakes & How to Fix Them
❌ WRONG:
Recording in a cluttered, inconsistent space without a stable background or lighting so each video looks different and confuses returning viewers.
✅ RIGHT:
Build a consistent at home YouTube studio setup: same backdrop, matching thumbnails, and repeatable lighting. Consistency builds recognition and binge behavior.
💥 IMPACT:
Fixing consistency can increase session watch time by 10-30% as viewers recognize and trust your series format, improving autoplay and playlist clicks.
YouTube Studio Setup - Essential At Home Studio Tips
Set up a binge-worthy YouTube studio at home by prioritizing lighting, sound, background design, and upload workflows that keep viewers watching. This guide gives measurable, intermediate tactics for creators aged 16-40 to build a consistent studio setup, improve retention, and scale production without breaking the bank.
Why Studio Setup Matters for Binge-Worthy Videos
Viewers are more likely to binge when videos feel professional and consistent. YouTube data shows consistent thumbnails and pacing increase session time - a key ranking signal in YouTube’s algorithm. A reliable studio setup reduces friction in production, allowing faster publishing and coherent series that drive playlist bingeing.
How do I design a Youtube studio Setup Background that improves retention?
Use depth with layered elements: a clean midground (desk or shelf), soft background lights for separation, and a consistent color strip tied to your branding. Avoid moving distractions and keep the focal point on the presenter to reduce cognitive load and increase time spent watching.
What is the optimal YouTube Studio desktop spec for smooth editing?
A recommended YouTube Studio desktop includes at least 16GB RAM, a modern multi-core CPU, a 500GB SSD for projects, and a discrete GPU for timeline acceleration. These specs reduce render times and support 1080p-4K workflows without stalling production efficiency.
How much does a Budget YouTube studio setup typically cost?
For a functional Budget YouTube studio setup expect to spend roughly USD 300-900: smartphone or entry camera, a quality USB mic, LED lighting, and basic backdrop or acoustic panels. Prioritize audio and lighting for the best cost-to-quality improvements.
Which YouTube studio Accessories most improve viewer perception?
Accessories that boost perceived quality include a directional microphone, soft key lighting, a reflector or fill light, and a consistent backdrop. Small investments in a shock mount, pop filter, and simple acoustic panels often reduce re-takes and polish your final videos significantly.
Ready to level up your studio setup? Reach out to PrimeTime Media for a custom setup audit and production workflow plan to turn your at home studio into a binge machine.
PrimeTime Advantage for Intermediate Creators
PrimeTime Media is an AI optimization service that revives old YouTube videos and pre-optimizes new uploads. It continuously monitors your entire library and auto-tests titles, descriptions, and packaging to maximize RPM and subscriber conversion. Unlike legacy toolbars and keyword gadgets (e.g., TubeBuddy, vidIQ, Social Blade style dashboards), PrimeTime acts directly on outcomes-revenue and subs-using live performance signals.
Continuous monitoring detects decays early and revives them with tested title/thumbnail/description updates.
Revenue-share model (50/50 on incremental lift) eliminates upfront risk and aligns incentives.
Optimization focuses on decision-stage intent and retention-not raw keyword stuffing-so RPM and subs rise together.
👉 Maximize Revenue from Your Existing Content Library. Learn more about optimization services: primetime.media
Key Goals for an Intermediate YouTube studio
Improve first 15 seconds retention to reduce early drop-off.
Create repeatable visuals and audio for consistent watch sessions.
Streamline editing and upload defaults to publish more often.
Optimize playlists and thumbnails to increase session length.
Essential Hardware and Costs
Budgeting smartly gets the biggest quality jump early. Below are recommended items with typical price ranges and why they matter for retention and production speed.
Camera: Entry mirrorless or high-end smartphone (USD 300-900). Modern phones with stabilization can match cameras for vlogging and talking-head formats.
Microphone: USB dynamic or shotgun mic (USD 80-250). Audio clarity boosts perceived production value and viewer trust, improving watch time.
Lighting: Softbox or LED panels (USD 70-300). Proper key and fill lighting reduce harsh shadows and help thumbnails pop.
Backdrop / Background: Collapsible fabric, seamless paper, or curated room setup (USD 20-200). A consistent Youtube studio Setup Background increases brand recognition across videos.
Stabilization & Mounts: Tripod and articulating arms (USD 20-150).
Accessories: Pop filter, shock mount, acoustic foam (USD 20-150). These YouTube studio Accessories solve common audio and reflection issues.
Desktop / Editing Rig: YouTube Studio desktop recommended specs: 16GB RAM, SSD, modern CPU/GPU (USD 600-1,500).
Budget YouTube studio setup tips
If you’re building a Budget YouTube studio setup, prioritize audio and lighting first - data shows viewers tolerate lower-resolution video but not poor audio. Use second-hand gear or smartphone accessories and invest in acoustic treatment for clearer sound and fewer retakes.
Studio Layout and Background Design
Backgrounds should support your niche and personality. A tidy, themed backdrop or a clean colored wall with depth helps thumbnails and reduces visual noise. Consider a Youtube studio setup image or background image in HD for overlays, but avoid distracting motion in the frame.
Use a three-layer background: foreground talent, midground props, and far background lights for depth.
Include brand colors subtly for thumbnail consistency and recognition.
Keep practical props relevant and rotated across series to avoid repetition fatigue.
Workflow: From Recording to Upload Using YouTube Studio desktop
Consistency in workflow shortens production time. Use YouTube Studio desktop features like upload defaults, playlists, and metadata templates to automate repetitive tasks and protect SEO consistency.
Step 1: Plan series and episodes with title and thumbnail templates to encourage playlist binge-watching.
Step 2: Set camera and audio levels, and run a 30-second test recording to confirm exposure and clarity.
Step 3: Record with scene markers or clap to simplify editing and chapter timestamps.
Step 4: Import to your editing machine (YouTube Studio desktop recommended specs) and apply a base edit template with intro/outro and lower thirds.
Step 5: Export using consistent codec settings (H.264, 1080p or 4K) and create a master thumbnail with consistent font and color blocks.
Step 6: Upload using YouTube Studio desktop, apply upload defaults for title templates, tags, and end screen templates to promote your next episode.
Step 7: Add the video to a themed playlist and enable auto-playlist sequencing so viewers are nudged into the next video.
Step 8: Use YouTube analytics after 24-48 hours to evaluate first-minute retention and tweak future episodes.
Step 9: Repurpose short clips for Shorts and community posts to drive cross-format discovery.
Step 10: Iterate thumbnails and titles based on click-through rate (CTR) and average view duration (AVD) data.
Audio and Lighting Best Practices with Data
Studies and creator benchmarks indicate audio issues cause higher early drop-off than shaky video. Aim for speech-to-noise ratio of +20dB and consistent key-to-fill lighting ratio at about 2:1 for flattering, cinematic look.
Use a directional mic and close-mic technique to increase clarity.
Position key light at a 30-45 degree angle above eye level for natural falloff.
Add a soft backlight or rim to separate talent from background for depth.
Thumbnail and Playlist Strategies to Drive Binge Sessions
Create a thumbnail template with consistent face position, color band, and bold headline. Playlists should be sequenced logically: "Start Here" -> core series -> deeper dives. YouTube's algorithm favors sessions where viewers watch multiple videos consecutively, so design playlists that anticipate the viewer journey.
Thumbnails: Maintain consistent margin, typography, and color contrast for recognition.
Playlists: Use clear episode numbers and short descriptions to set expectations.
End screens and cards: Link to the next episode and include visual cues like "Next Episode" overlays.
Automation and Efficiency Tools
Use templates inside YouTube Studio desktop plus external tools for batch edits. PrimeTime Media recommends combining upload defaults with comment moderation automation to scale engagement. For advanced comment analysis and automation, see PrimeTime Media’s guide on Automate YouTube comments analysis.
Batch export and render queue templates in your NLE (Premiere, DaVinci Resolve).
Use YouTube upload defaults for recurring metadata and licensing to save 60-90 seconds per upload.
Automate comment moderation and tagging workflows to prioritize high-value replies; learn more at PrimeTime Media's resources for creators building scale.
Creative Ideas and Kits
Consider a youtube studio setup kit tailored to your format: talking-head kits, product-review kits, or gaming stream kits. If you need inspiration for visuals or background image downloads, curate a folder of approved youtube studio setup image options in HD for quick swaps.
Vlogging kit: lightweight tripod, lapel mic, LED ring light.
Review kit: camera on slider, two softbox lights, neutral background.
Streaming kit: capture card, green screen, ring/soft LEDs, mid-level PC for streaming.
Measuring Impact and Iteration
Track CTR, average view duration (AVD), audience retention curves, and session watch time. Small changes to thumbnails or intro pacing can increase session watch time by 10-25% when matched to audience preferences. Use YouTube Creator Academy and Support Center guidance for metric definitions and best practices.
Learn and apply official guidance to avoid policy issues and to optimize performance: refer to the YouTube Creator Academy for creative best practices and the YouTube Help Center for technical requirements. For market trends and promotional insights, read Think with Google and community strategy pieces on Hootsuite Blog.
PrimeTime Media specializes in helping creators convert studio setups into scalable production systems. If you want tailored studio setup recommendations or a review of your YouTube Studio desktop workflow, PrimeTime Media can audit your processes and deliver a clear action plan. Contact PrimeTime Media to improve retention and build binge-worthy series.
Intermediate FAQs
🎯 Key Takeaways
Scale YouTube Studio Setup - A Beginner's Guide to Binge-Worthy Vi in your YouTube Growth practice
Advanced optimization
Proven strategies
⚠️ Common Mistakes & How to Fix Them
❌ WRONG:
Relying only on a fancy camera while neglecting audio, lighting, and background consistency. This leads to polished visuals but poor retention and lower binge potential.
✅ RIGHT:
Prioritize a clear microphone setup and soft lighting, then upgrade camera when workflows are stable. Use consistent background elements and thumbnail templates to build series recognition.
💥 IMPACT:
Correcting this can improve first-minute retention by 8-20% and increase session watch time, which often leads to higher recommendation rates and more organic growth.
Master YouTube Studio Setup and Essentials
A binge-worthy YouTube studio setup blends camera, sound, lighting, and metadata workflows to create consistent, clickable series. Focus on reliable at home infrastructure, reproducible backgrounds, and automations in YouTube Studio desktop to scale output, improve retention, and streamline growth with data-driven templates and batch workflows.
Why Advanced Studio Setup Matters for Binge-Worthy Videos
For creators aged 16-40 aiming to build series-based channels, an advanced studio setup transforms episodic ideas into repeatable production lines. A professional approach reduces friction, raises production value, improves click-through and session time metrics, and frees creative energy for storytelling rather than technical troubleshooting.
Budget Considerations and Cost Control
Budget YouTube studio setup can cost under $500 for essentials (camera phone + mic + lights), while pro builds with camera bodies, lenses, acoustic treatment, and multi-light rigs climb higher. Prioritize microphone and lighting first for the biggest perceived quality gains.
How do I structure upload defaults for a bingeable series?
Set upload defaults that include series-specific title frameworks, a description template with chapter timestamps, default tags, and a playlist assignment. Use YouTube Studio desktop to save these defaults, then batch-apply during scheduled uploads to maintain consistent metadata across episodes for better discoverability.
What background options are best for a small at home studio?
Use a compact muslin or seamless paper backdrop paired with LED accent lights to create depth. Add a practical like a shelf with branded props and two soft lights for subject separation. This low-cost setup supports a repeatable Youtube studio setup background that photographs well for mobile viewers.
How can I automate thumbnail testing and selection?
Run thumbnail A/B tests using YouTube experiments or third-party platforms, then promote the winning variant across playlists and future episodes. Automate reporting to flag winners and push the selected thumbnail to scheduled uploads via your asset management system for consistent branding.
What are the best metrics to track for binge growth?
Prioritize audience retention, session watch time, and playlist-driven view chains. Monitor impression click-through rate and percent viewed per episode; improvements in these metrics indicate stronger binge behavior and help determine thumbnail and title iterations for series optimization.
How do I scale production without losing brand quality?
Create rigorous SOPs: shot lists, camera presets, lighting diagrams, and metadata templates. Delegate edits with clear version control and feedback cycles. Use automation for captions and scheduling while maintaining a brand review stage to ensure quality across episodes as you scale.
PrimeTime Advantage for Advanced Creators
PrimeTime Media is an AI optimization service that revives old YouTube videos and pre-optimizes new uploads. It continuously monitors your entire library and auto-tests titles, descriptions, and packaging to maximize RPM and subscriber conversion. Unlike legacy toolbars and keyword gadgets (e.g., TubeBuddy, vidIQ, Social Blade style dashboards), PrimeTime acts directly on outcomes-revenue and subs-using live performance signals.
Continuous monitoring detects decays early and revives them with tested title/thumbnail/description updates.
Revenue-share model (50/50 on incremental lift) eliminates upfront risk and aligns incentives.
Optimization focuses on decision-stage intent and retention-not raw keyword stuffing-so RPM and subs rise together.
👉 Maximize Revenue from Your Existing Content Library. Learn more about optimization services: primetime.media
Core Objectives for Advanced Creators
Consistency: Repeatable lighting, audio, framing, and metadata templates that signal brand identity.
Efficiency: Batch production and upload defaults that scale weekly video output without quality loss.
Optimization: Use YouTube Studio desktop analytics and automated rules to iterate thumbnails, titles, and playlists.
Scalability: Systems for delegating editing, captioning, and comment moderation while retaining creative control.
Essential Hardware and Accessories
Invest where it matters: clean audio, controlled lighting, and a dependable capture path to your editing suite. Below are prioritized items and studio accessories that deliver the best ROI for at home creators on a spectrum from budget to pro.
Priority Gear
Microphone: XLR condenser or dynamic with audio interface for low noise; USB for budget setups.
Camera: Mirrorless or high-quality webcam; prioritize clean HDMI output for live recordings.
Lighting: Key light with softbox or LED panel, fill and back lights for separation.
Support: Sturdy tripod or articulating arm to hold camera/phone consistently.
Backdrop options: Fabric, foam panels, or LED wall to create a repeatable Youtube studio Setup Background.
Accessories: Acoustic panels, pop filter, cable management, and surge protection.
Advanced Studio Setup Workflow - 9 Steps to Scale Production
Follow these 9 steps to move from ad-hoc recording to a scalable, binge-driven production pipeline using YouTube Studio desktop, metadata templates, and automation.
Step 1: Define your series format and episode anatomy - intro, hook, segment breaks, CTA, and end screen positions - so every shoot follows the same script structure for easy editing and thumbnail consistency.
Step 2: Design a reusable at home shot list and lighting diagram that anyone on your team can replicate to keep visual continuity across episodes and reduce setup time.
Step 3: Create camera and audio presets on your devices and editing software; save LUTs, EQ settings, and multicam layouts so editors can deliver a unified look fast.
Step 4: Build metadata templates in YouTube Studio desktop: title frameworks, tag groups, description templates with timestamps and affiliate links, and standardized chapters for binge optimization.
Step 5: Batch-record and batch-edit: schedule blocks for filming multiple episodes, then process edits in assembly-line stages-editing, color, sound, captions-using a versioned file structure.
Step 6: Automate repetitive tasks-auto-generated captions, scheduled uploads, and comment moderation rules-linking to APIs or tools when needed to reduce manual steps.
Step 7: Create thumbnail templates and A/B test variations using clear microcopy, brand colors, and face/emotion shots; push winners through YouTube experiments and reapply to future episodes.
Step 8: Organize playlists and end screen chains to encourage binge sessions; map content clusters in YouTube Studio to drive viewers into sequential episodes.
Step 9: Monitor performance in YouTube Studio desktop and external analytics weekly; iterate thumbnails, titles, and playlist order based on audience retention, traffic sources, and impression click-through rates.
Metadata, Templates, and Upload Defaults
Metadata is your production automation engine. Create scalable templates so every upload aligns with SEO, discovery, and binge patterns.
What to Template
Title frameworks with episode numbers and key hooks.
Description blocks: short hook, chapter timestamps, sponsor disclosures, and links to related playlist.
Tag groups: core channel tags, series tags, and episode-specific tags.
Thumbnail naming conventions and folders for editable templates.
Using YouTube Studio Desktop for Defaults
Set upload defaults for visibility, category, default tags, and end screens. Use YouTube Studio desktop to pre-fill cards and manage playlist placements so every video ships with the same discovery scaffolding.
Backgrounds, Branding, and Visual Consistency
Whether you use a physical backdrop, green screen, or branded set, consistency builds recognition. The Youtube studio Setup Background should be easily reproducible and scalable to support guest shoots and remote recording.
Practical Background Options
Budget YouTube studio setup: textured wall, soft LED accent lights, and a single branded prop for identity.
Hybrid at home kit: collapsible muslin backdrop plus LED key and practical lights for depth.
Pro studio: modular set pieces, light control, and dedicated makeup/prop area for fast turnover.
Thumbnail and Series Design for Bingeability
Thumbnails should read as a set: consistent typography, color bars, and a small episode number badge. Use face shots with emotional expressions and short microcopy (2-4 words). Maintain templates so A/B tests scale across entire seasons.
Thumbnail Best Practices
Keep faces large, eyes visible, and contrast high for mobile visibility.
Use consistent top-left logo and bottom-right episode badge to cue series continuity.
Test color backgrounds and microcopy lengths across episode groups to learn patterns.
Analytics, Automation, and Scaling with APIs
Advanced creators use data pipelines and automation to scale. Start with YouTube Studio desktop analytics and graduate to automated comment moderation, thumbnail A/B testing, and custom dashboards via APIs.
Where to Automate
Comment moderation: set canned responses for FAQs and escalate high-value leads to DMs.
Thumbnail experiments: run experiments and automatically promote winners to playlists.
Publishing pipelines: scheduled uploads with pre-seeded chapters and metadata.
Link YouTube Studio desktop with workflow apps and analytics: use cloud storage for source files, task management for editorial pipelines, and APIs for custom reporting.
Recommended Integrations
Cloud editors and asset managers for version control.
Automation tools for captions and social repurposing.
Custom dashboards pulling data from YouTube APIs and third-party analytics for cross-platform insights.
🎯 Key Takeaways
Expert YouTube Studio Setup - A Beginner's Guide to Binge-Worthy Vi techniques for YouTube Growth
Maximum impact
Industry-leading results
❌ WRONG:
Relying solely on a flashy single-video setup without repeatable templates or consistent backgrounds, which makes scaling episodes time-consuming and inconsistent.
✅ RIGHT:
Implement repeatable shot lists, lighting presets, and metadata templates so each episode requires minimal setup and delivers consistent visual and discovery signals.
💥 IMPACT:
Switching to repeatable systems can reduce shoot-to-publish time by 40-60% and improve sequential-view sessions by 10-25% through consistent branding and playlisting.